¶ Users, roles and permissions
This page describes how administrators manage users in Diri, from creating and inviting them to giving them the right roles. User management follows the organisation structure: a user belongs to one or more organisations, and has a role in each of them. The role decides what the user can see and do there.
For how roles, role reach, restricted roles and offering below fit together, start with How access works.
¶ Users, roles and permissions explained
- Users are the people who have access to Diri. Each user has a profile (name, email, phone, language) and belongs to one or more organisations.
- Roles group what a user is allowed to do. A user gets a role per organisation, for example User Risk in one organisation and Auditor in another.
- Permissions are the building blocks of a role: which actions (read, create, update, delete) the role may perform on which type of record.

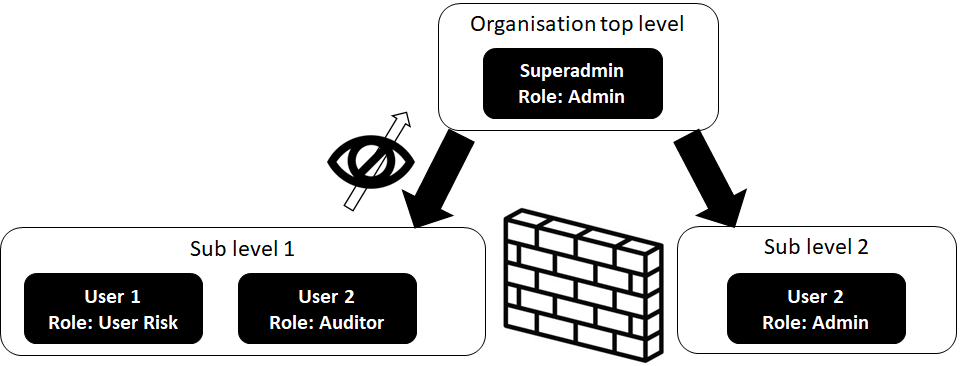
In the example above, the super admin is placed at the top level, with two sub-organisations below. User 1 belongs to “Sub level 1” and has the role User Risk. User 2 belongs to “Sub level 2” and has the role Admin. The super admin manages the setup and can see everything, while User 1 and User 2 see neither the super admin nor each other; each is confined to their own organisation.
¶ Managing users
Go to Users & Access in the Administration part of the left-hand menu. The page has three tabs: Users, Organisation and Access Control. Only users with permission to manage users see this page.
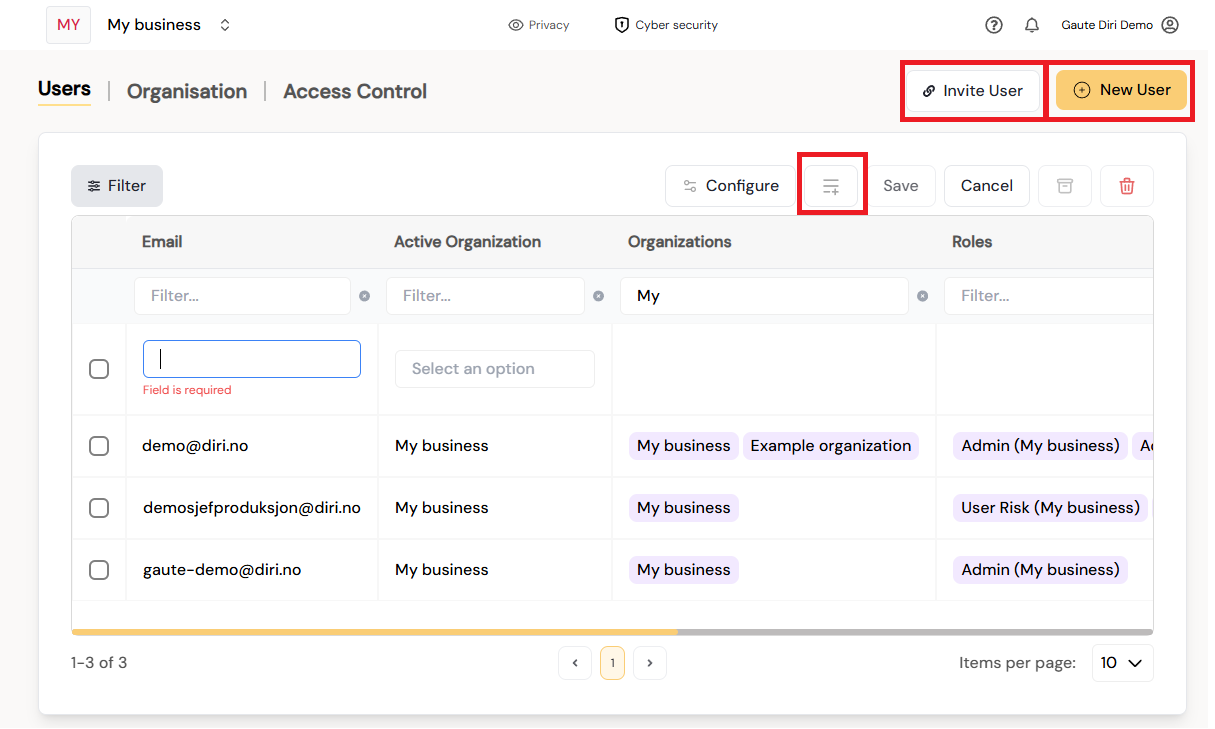
The Users tab lists the users in your active organisation and the organisations below it, with their organisations, roles and two-factor authentication status. There are two ways to add users: New User and Invite User.
¶ New User and Edit User
Click New User to open the Create User form. The same form opens when you click an existing user to edit them.

Notable fields:
- Member of – the organisations the user can switch between. Membership alone gives no access; roles do.
- Roles – pick a role in each organisation the user should work in. It applies there, and below it if role reach is on.
- Working in – where the user is now, and where they start after signing in. Changing it here moves them there at once, also in tabs they have open.
- System Language – English or Norwegian.
When editing a user you can also set a new password for them, see and reset their two-factor authentication (see Two-factor authentication), and adjust their notification settings. Click Save to save the user.
¶ Invite User
Click Invite User to invite someone by email. The invitee becomes a member of the organisation you are working in, with the roles you pick, and starts there. Enter the user's email, pick their role(s), and click Send invite. The user receives an email and is created in the organisation when they accept the invitation.
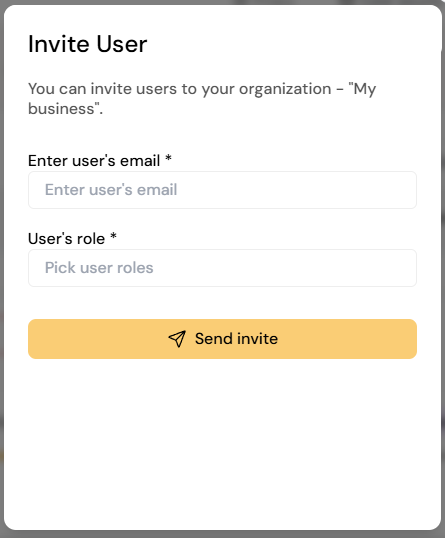
You can also invite users directly to a specific organisation with the user+ icon on the organisation bar in the Organisation tab. See Build and manage your organisation tree.
Users from your Microsoft tenant can also be created automatically the first time they sign in with Microsoft, if Microsoft sign-in is set up for your organisation.
¶ Role-based access control (RBAC)
Diri uses role-based access control: users get access through roles, never directly. This keeps permission management simple even in large organisations with many users, and makes it easy to give, for example, auditors read-only access.
¶ Administrators
- Super admin – Cyrigo staff who manage the whole platform, for example creating new top-level organisations.
- Top-level administrator – the administrator of your top-level organisation. Has full control over the whole organisation tree, including the sign-in settings (Microsoft sign-in, session lifetime and two-factor requirement) on the top-level organisation. This role is set up together with Cyrigo during onboarding.
- Admin (role) – an administrator of a specific organisation. An Admin can manage users, settings and content in that organisation and in every organisation below it, and can create sub-organisations.
¶ Predefined roles
Every organisation comes with a set of predefined roles. They are marked Default and cannot be changed or deleted.
| Role | What it can do |
|---|---|
| Admin | Everything in this organisation and all organisations below it, including users, roles and settings. |
| User Risk | Create and edit risk assessments, treatments and the registers. Read incidents. |
| User Privacy | As User Risk, plus data processing activities and DPIAs. |
| User Compliance | As User Risk, plus reports and incidents. |
| Auditor | Read everything the user roles can edit. Cannot change anything. |
| Read and sign | As Auditor, and may sign treatment plans. |
For all roles except Admin, users, organisations and settings are read-only. Only administrators can change users, roles, organisations and settings.
The left-hand menu follows the role that applies where the user is working: User Risk belongs to the Cyber security and Operational risk modules, User Privacy to Privacy, and User Compliance to Governance & Compliance. Users see the module groups that belong to their role, while administrators see everything their organisation has. A user role is only offered when your organisation has one of its modules.
To limit User Risk, User Privacy and User Compliance users to their own content, see Restricted roles.
¶ Roles and permissions (Access Control)
The roles and permissions are managed in Users & Access → Access Control. The tab has two lists: Roles and Permissions. Select a role to see its users and permissions.

Administrators can create their own roles in addition to the predefined ones:
- In Access Control, click Add role.
- Enter a Role name.
- Under Attach permissions, select the permissions the role should have.
- Save the role.
To create a new permission, click Add permission, give it a Permission name and Description, choose the Resource (the type of record) and the actions: Read, Create, Update and Delete. Use Add existing permission to attach a permission that already exists to a role.
To let a custom role see framework status, it needs read access to all the framework resources listed under See framework status in the permission form. Granting only some of them lets the user reach the Frameworks page without being able to load it.
¶ Securing roles and rights
- Predefined roles cannot be changed or deleted.
- Only administrators can assign roles to users.
- Users cannot change their own or others' roles.
- Changes are recorded in Latest Events, the audit log, which no one can edit or delete – administrators included.
¶ Users with roles in several organisations
A user can be a member of several organisations and have a different role in each, for example User Risk in Organisation 1 and User Privacy in Organisation 2. In the user form, add both organisations under Member of and pick a role for each under Roles.
In the user form, the user gets a second organisation and a role in that organisation:
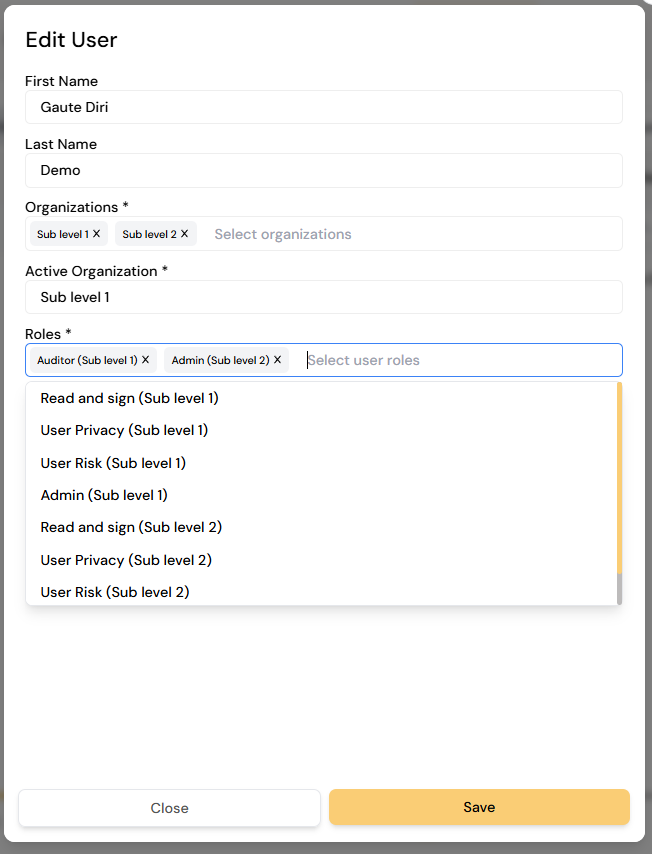
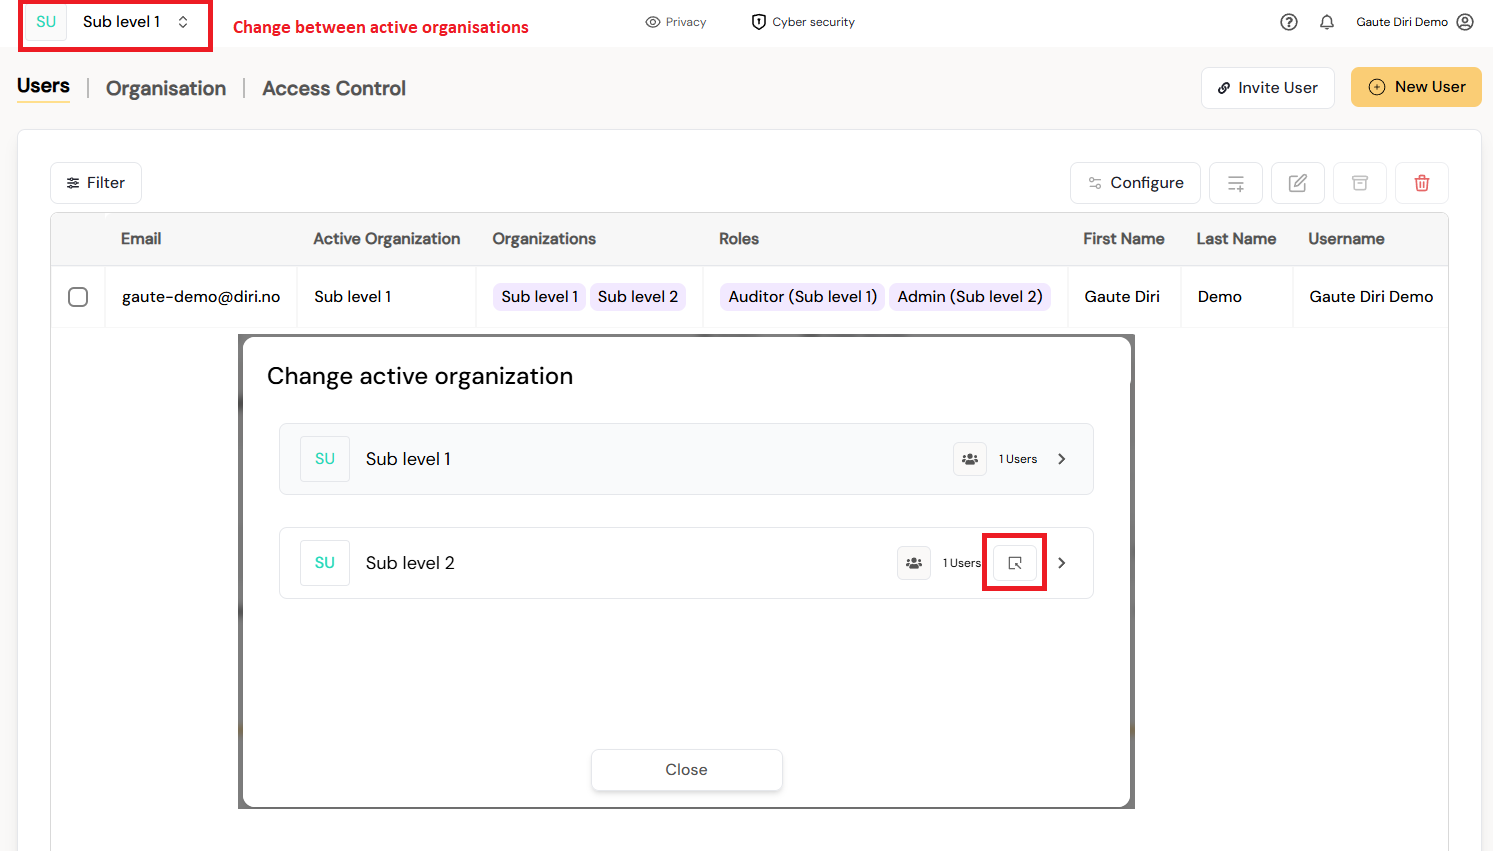
The user switches between the organisations with the organisation switcher at the top of the page. The role that applies is always the one held where the user is working; roles from different organisations are never combined.
¶ Roles in the organisations below
You don't need to add a user to every organisation they work in. With role reach switched on, a role held in an organisation also covers the organisations below it. Administrator roles always do.